Supercharge your inbox for business
Declutter your inbox, keep things organized, and make your business scalable
Hey, Lior here! Every week I’m giving you an insider’s view into the world of indie hacking and building products used by millions, with actionable tips on productivity and entrepreneurship. Subscribe below and follow me on Twitter if you haven’t yet.
In today’s issue, I’m going to share:
What I’m working on: easy Terms of Service and Privacy Policy for developers
How to supercharge your inbox for business with Google Groups
Terms and Privacy Policy for Developers
Having built dozens of websites, one thing that comes up over and over is the need to have Terms of Service and Privacy Policy.
The options for creating terms and privacy range from paying lawyers thousands of dollars, to downloading a free generic template, or using GPT to generate one.
If you’re a developer or a small business owner, I feel like the same problems come up every time:
Problem 1: it takes away time and focus from building the product
As a small maker, you’d like to spend your time building your app, not working on legal matters. On the other hand, if you use a generic privacy policy or terms, you risk misrepresenting what your website does, and you open yourself up to liability.
Problem 2: Word documents don’t integrate easily with your website
Most lawyers, online generators, and templates provide you with a Word document. Whether you use React, Next.js, Vue.js, or Vanilla HTML and CSS, this means spending a few hours tinkering with code and design to embed that document properly into your website.
Problem 3: your product keeps evolving, but your terms/privacy don’t
As you work on your product, you change what it does, how it makes money, and how it handles user data. You add new authentication methods, payment providers, analytics tools, and data processing. The law also changes over the years. Unfortunately, your terms and privacy policy don’t update, and soon become out of date.
Easy Terms of Service for developers?
I’m exploring whether I can create a better solution for developers and small businesses:
Auto-generating terms on the spot, without long questionnaires, by analyzing your website content (GPT can help) and the technologies it uses.
Allowing you to embed terms and privacy in your website by simply pasting a few lines of code.
Keeping your policies up-to-date, even as your site, business, or the law evolves.
What do you think about that concept? Please reply or leave a comment.
Supercharge your business inbox with Google Groups
Today, I’m going to share how you can use Google Groups to declutter your email, keep things organized, and make your business more scalable.
Gmail doesn’t scale well with business
While Gmail is a fairly powerful product, it does not scale well when you run a business, even a small one:
Your inbox gets all the emails, all the time, creating constant context switching: you get invoices for expenses, customer payments, user support and feedback, sales requests, uptime alerts, analytics, reports, and more.
Things get lost - it’s harder to track things like expenses or customer payments.
It’s harder to delegate and collaborate - say you hire someone to handle customer support, bookkeeping, or admin. How do you ensure relevant emails are accessible to them, and more importantly, don’t bloat your inbox?
Google Groups to the rescue
Most people know Google Groups as a mailing list platform, where you join groups of people who post about certain topics regularly via email.
However, if you have a Google Workspace account (previously known as G-Suite), you can use Google Groups to set up the flow of email and information within your business. It allows you to:
Create multiple groups like support@company.com or sales@company.com without having to create a separate user for each one.
For each group, you can define who has access (you, teammates, outside contractors): who can read emails, who can send emails, and who receives emails to their inbox. This allows you to delegate and also cleans up your inbox.
Browse and search all messages to a particular address (expenses, support, sales) in one place.
Look like a legit business - support@company.com usually looks better than yourname@company.com
Step 1: Set up a Google Workspace
If you don’t have one, buy a domain name for your business. I currently recommend using Namecheap for that. For the sake of simplicity, let’s say your domain is company.com.
If you don’t have a Google Workspace account for your business, you can sign up here. Their Business Starter plan is enough for most users and currently costs only $6/mo per user.
Set up the first Workspace user, e.g. yourname@company.com, and connect Workspace to your domain.
Step 2: Choose which Google Groups to create
Each Google Group will have its own email address (e.g. contact@company.com or support@company.com), and creating groups is free.
Which groups you choose to create largely depends on your business and the kind of emails you send and receive. You can also create aliases so several addresses lead to the same group. Here are some suggestions for groups you may create:
income - payment alerts from Stripe, PayPal, Amazon, Shopify
expenses - invoices/receipts for expenses incurred by you
support - customer support and feedback
sales - inbound and outbound sales
marketing - marketing ops, advertising, SEO/SEM, media inquiries
product - product analytics and reports
development - software development notifications, e.g. GitHub or Asana
reliability - downtime and site reliability alerts
legal - legal notices and correspondence
finance - banks, credit cards, tax, and accounting
operations - office, insurance, government, virtual postal mail
catchall - you can redirect all emails sent to non-existing addresses on your domain to catchall@company.com. See this guide.
Step 3: Create the Google Groups
Here’s the process for creating a single group, you can do this for as many groups as you want:
Go to your Google Workspace Admin Console → choose “Directory” on the sidebar → navigate to Groups.
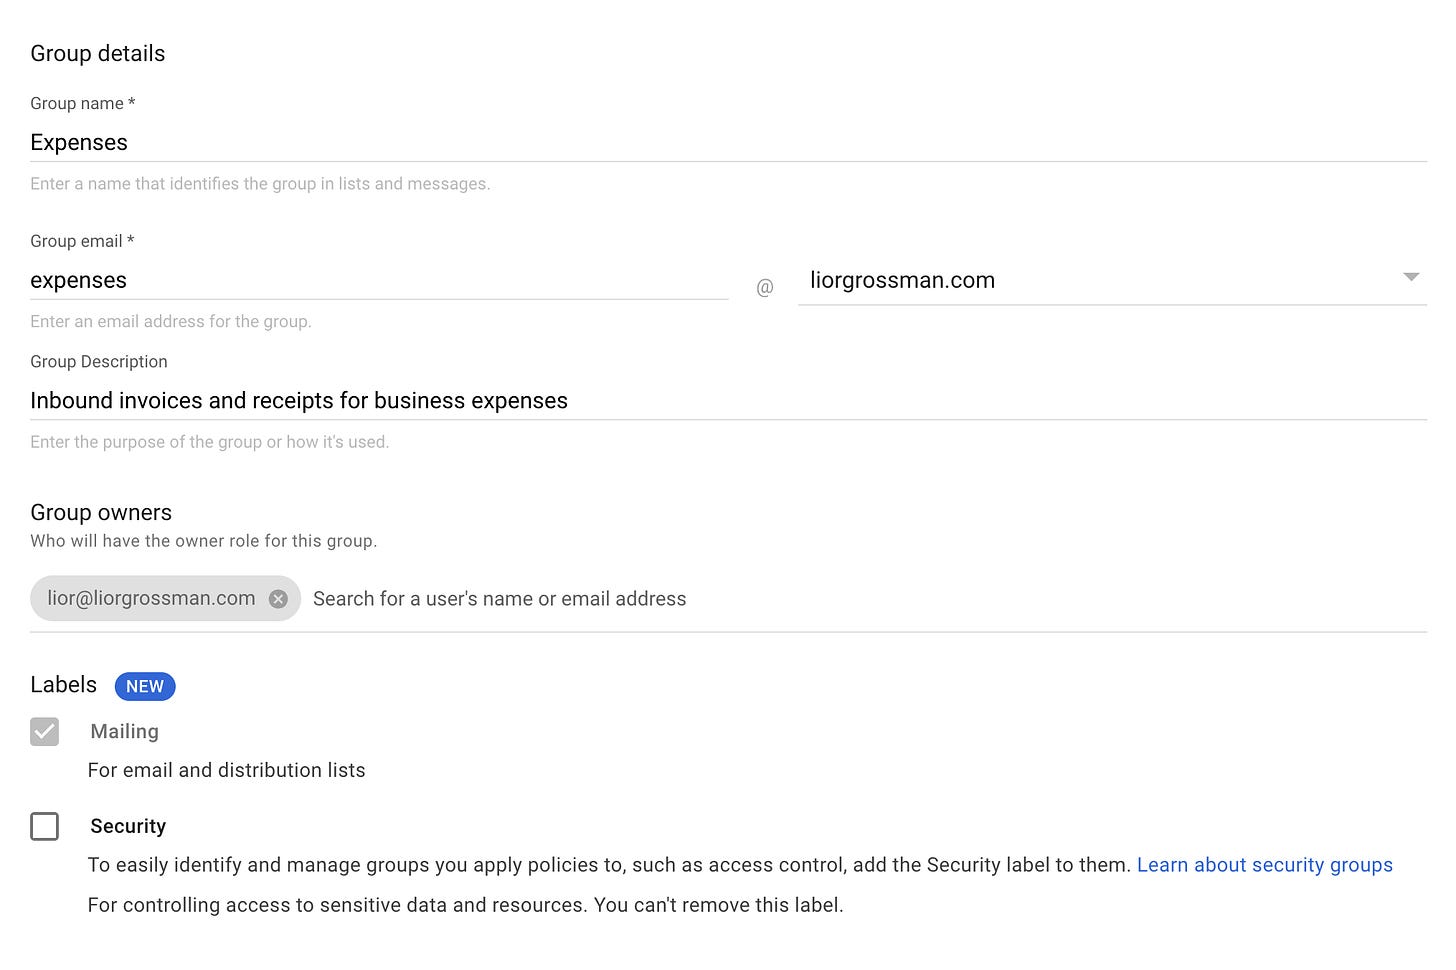
Hit the “Create group” button. Fill in the name and email, and add yourself as a group owner, then hit “Next”
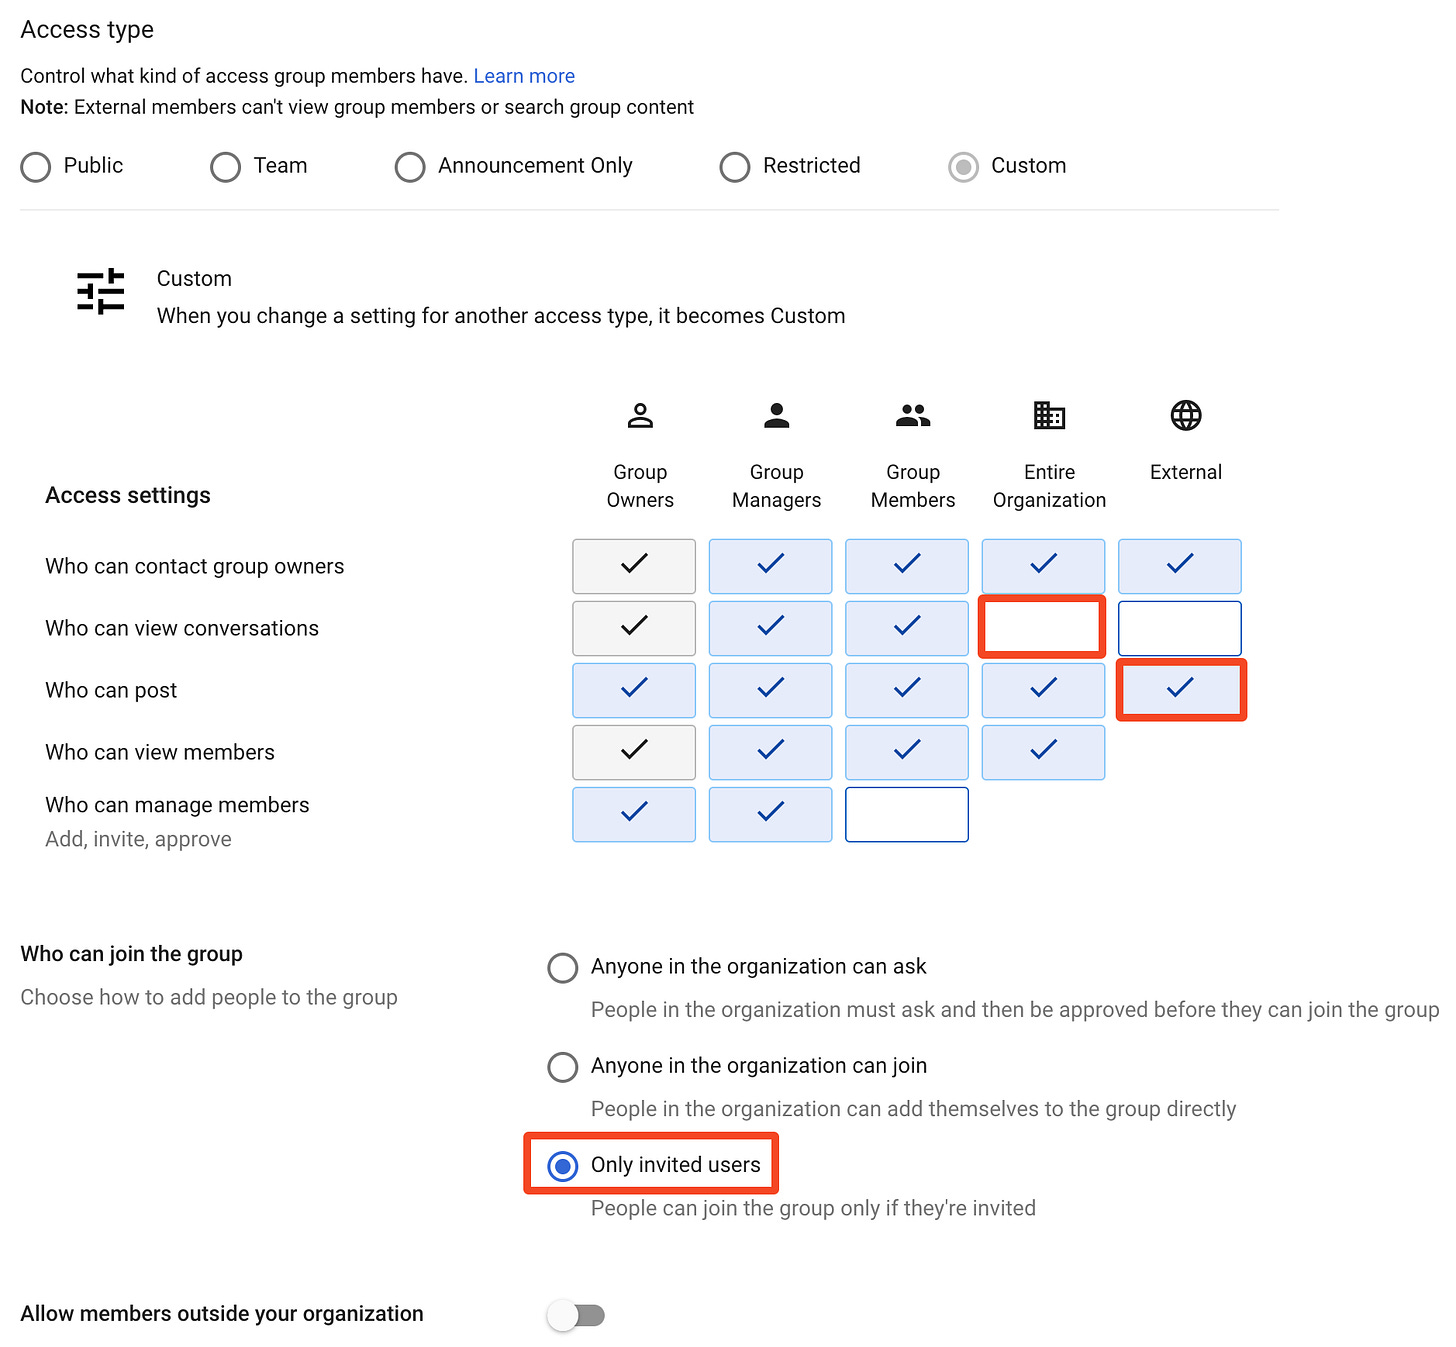
On the following screen, you set up the access permissions for the group.
Be mindful to set the proper access permissions for your needs.
Personally, I’m usually making the following changes to the default (see screenshot below):
Who can view conversations: changing it from “Entire Organization” to “Group Members” so only members can read emails from/to this address
Who can post: changing it from “Entire Organization” to “External.” This is necessary so people outside your organization can send emails to this address.
Who can join the group: changing it from “Anyone in the organization” to “Only invited users” - since you usually don’t want everyone in the organization to have access to these emails.
Go to Google Groups (it’s separate from the Admin Console) → select All groups in the sidebar
Choose your newly-created group from the list of Groups.
Then select “Group settings” on the sidebar:
Under “Posting policies,” consider changing “Who can post as group” to “Group members.” This allows group members like yourself to send outbound emails from the address expenses@company.com.
If you don’t want your group to filter suspected spam for you and send you a “Moderator’s spam report” every few days, you may want to change “Spam message handling” to “Post suspicious messages to the group”
After creating a group - it’s a good idea to test if emails go through:
Send a test email from an external email to your new group and see if you receive it.
If you’re interested in sending emails from this new email address, first add it as a sender, then send a test email to an external address and see if it’s received.
Step 4: update your email address for various services
You can now benefit by updating your email address on services that you use, for example:
Analytics platform: use product@company.com
CRM: use sales@company.com
Error reporting: use reliability@company.com
Many services let you specify a separate “Billing Email” - use expenses@company.com as a Billing Email to get all business invoices in one place.
Voila!
You now have multiple addresses for each major aspect of your business.
You can define which addresses get to your inbox and how, you can make emails accessible to employees or contractors, and you can create filters to move all expenses or support emails into a dedicated folder.
I hope you’ve enjoyed this issue of the newsletter.
Do you have any thoughts or questions? Please reply and let me know.
Best,
Lior


